Showing posts with label Dinner. Show all posts

Tuesday, June 12, 2012

Chicken Cacciatore made light


I've decided this picture definitely doesn't do the meal justice.  So, as can be guessed - this meal was fabulous! Why am i having such great luck when it comes to exploring cooking? I am very excited because although the recipe intimidated me, this recipe was ridiculously easy to make.  It took at the most 45 minutes to make, 25 of that was just cook time!

Here is the original recipe. (From Annie, and I think from Weight Watchers)
 Ingredients
6 chicken thighs, boneless, skinless, (about 1½ lbs)
⅛  teaspoon salt
¼ teaspoon fresh ground pepper
1 tablespoon olive oil
1 tablespoon garlic, minced
8-10 ounce package mushrooms, sliced
1 large onion. chopped, about 2 cups
1 large red bell pepper, sliced thin
1 yellow bell pepper, sliced thin
½ cup white wine
1 (24 oz) jar Classico Tomato and Basil Tomato Sauce or your favorite
½ teaspoon Italian seasonings
Fresh ground pepper, to taste

Instructions
1. Sprinkle chicken thighs with a little salt and pepper.  In a large nonstick pan, add the chicken and cook about 5 minutes or until brown, turning once.  Remove chicken from pan to a plate.  While the chicken is browning, place the mushrooms, onions and both peppers in a large microwave-safe bowl.  Cook in microwave for about 2-3 minutes until the vegetables are softened.
2. In the same large pan, heat 1 tablespoon olive oil.  Add garlic, softened mushrooms, onions and peppers.   Saute on high heat until lightly browned and soft, about 3-4 minutes.
3. Stir in wine and cook for about 1-2 minutes until wine is almost evaporated.
4. Return chicken to pan and add the tomato sauce, Italian seasonings and fresh ground pepper.  Bring to a boil, reduce heat and cook uncovered for about 15 minutes until chicken is tender and no longer pink.

And how I made it:
You should know...This makes a lot of food, or i should say a lot for two people.  I think it could feed 4-6 people!
First of all, I used chicken breasts instead of chicken thighs. I'm sure its good either way, but I just so happen to usually have chicken breasts in my freezer.  So, I used 2 1/2 boneless chicken breasts.  I cut the two whole chicken breasts in half and so to start off, I had 5 pieces of chicken.  As the recipe says, I sprinkled them with salt and pepper and then cooked the chicken until it was browning.  I did this on medium heat, and I would say it took about 5 or so minutes.  I was nervous during this part because the whole chicken wasn't getting cooked, just the outside.  However, I ventured on and realized that the entire chicken gets cooked by the end of the meal.  
While the chicken was browning, I cut up my bell peppers and onion and placed them in a Tupperware with the mushrooms ( i bought the mushrooms sliced).  I would recommend doing the chopping before starting the chicken because it got slightly hectic!  Anyway, as the recipe says i put them in the microwave for 2 minutes.  When the chicken was done, i took it out of the pan and poured in the veggies.  BTW, I used 1 TBSP garlic powder instead of garlic cloves.  I sauteed the veggies until they were brown and sizzling.  I added the cooking wine and continued cooking for a couple minutes.This is what it looked like:
 
Then I added the chicken back into the pan and sliced each piece in half, I did this to ensure that it got fully cooked! So now I had 10 pieces of chicken (if you're counting!). I added the tomato sauce, Italian seasonings and pepper.  It was boiling after about 20 seconds so then I reduced the heat to low and let it simmer for about 15 minutes.  

The recipe doesn't mention anything about noodles, but I just thought it should have noodles! So i made some fettuccine noodles to go with it.  I would actually recommend more penne style noodles, but that's all I had so i went with it.  It was yummy!  See!!!:

And, i complemented the entire meal with some corn.  Can't go wrong with corn or green beans with every meal ;-)


Thursday, June 7, 2012

Manicotti, or something like it.

The final product!

A few months ago, my sister Michelle (here she is!!!)
 told me about this stuffed noodle recipe she makes.  It sounded pretty good, so I bought some of the ingredients I thought went in it.  Time passed, and I kept forgetting to get the recipe from her! 
Well, the other day (yesterday)  I decided since things had calmed down a bit I wanted to cook a home made meal.  I looked in my cupboard to see what I had and I saw those stuffed shells I had bought months previous!  I decided to see what kind of meal I could make with them.  Unfortanately, as I was searching through recipes almost every meal included ricotti or other cheeses like that.  Even more unfortanately, I was in a mood where I really didn't want to go to the store! Then I stumbled across the one and only recipe I could find that didn't take a whole lot of ingredients. I was in very unfamiliar territory, but I decided to try it.  It turned out YUMMY! And I even made some changes to the recipe, so I feel pretty cool. Also, i just have to say that being back in the kitchen and cooking a meal felt so absolutely wonderful.  I love it!  This recipe was simple and quick.  I think overall it took about 30 minutes.
Here is the original recipe:
Ingredients:
14 uncooked manicotti shells
1/2 pound ground beef
1 small onion, finely chopped
1/2 green bell pepper, finely chopped
1 (15 ounce) can tomato sauce
1 teaspoon dried oregano
1 teaspoon dried thyme
1 cup shredded mozzarella cheese,
divided
Directions:
1.Cook manicotti according to package directions; drain. In a skillet, cook the beef, onion and green pepper over medium heat until meat is no longer pink; drain. Stir in the tomato sauce, oregano and thyme; bring to a boil. Reduce heat; simmer, uncovered, for 10 minutes. Add 1/2 cup cheese; stir until melted.
2.Stuff half meat mixture into manicotti shells; arrange in a greased 8-in. square baking dish. Spoon remaining meat mixture over shells. Bake, uncovered, at 325 degrees F for 20 minutes. Sprinkle with remaining cheese; bake 5-10 minutes longer or until heated through and cheese is melted.

Here is how I made it...and wow.  Looking at the recipe again makes me realize that I really did change it up! The following is the Lazy Persons way to do this recipe:

First of all, I realized a little too late that I had stuffed shells instead of Manicotti noodles.  At this point, I decided to stick with it and see what happened. So, to start off, I boiled a package of stuffed noodles for about 5-7 minutes.  The important thing here is to undercook your noodles so that they are easier to fill with the ingredients.  Don't worry, they will finish cooking later in the oven!
As I was boiling my noodles, I defrosted my groundbeef in the microwave.  I used a guestimate of 1/2 lb of ground beef.  I've found that you can use more or less groundbeef and it is okay! The meal will turn out great.
After I had drained my noodles, I started cooking my groundbeef in a saucepan.  Instead of an actual onion, I used 1/2 TBSP of onion powder.  I've started doing this substition quite frequently and I haven't been sad as of yet.  I also added 1/2 tsp of garlic powder. 
Helpful Hint #7: 1 small onion = 1/2 TBSP onion powder.  1 medium onion = 1 TBSP onion powder.  1 large onion = 1 1/2 TBSP onion powder. 
1 medium sized clove garlic = 1/4 tsp garlic powder.  1 large or 2 medium cloves = 1/2 tsp garlic powder.
After my groundbeef was browned, I drained it. I always drain it and am shocked by all the grease that comes out - YUCK! I put the groundbeef back into the saucepan and instead of tomato sauce, i added 1 jar of spaghetti sauce, 1 tsp oregano and 1 tsp thyme.  I did not use the green bell pepper, although I think this would only add excellence! I brought the sauce mixture to a boil and then reduced heat and let it simmer for about 10-15 minutes.  The longer you let it simmer, the better the taste will be.  As I did this, I turned my oven on to 325 degreees.  Then i added some mozarella cheese and dove into the scary part!
After I greased a 9X9 baking dish, I poured my noodles in the pan. 
Stuffing the noodles!!!  I would pick up a noodle, open the noodle slightly, spoon some of the sauce mixture in and set it back into the pan. And yes, some of the sauce mixture would fall out. Some stayed in, so I wasn't too worried.  It may simple to describe this process, but I had no idea what to do so this is what i did! And it worked!  I didn't end up using all of my noodles, so i took some out, but it was about two layers of noodles in the pan.  I stopped when I decided I had just enough left to cover all the noodles and then I put it in the oven! I baked it for about 10 minutes, added some cheese on top and put it back in for about 3 minutes. 
It came out looking delightful and then luckily it tasted just as delightful! Evan seemed to love it and I did too! We even had leftovers. I haven't tried them yet, but I believe they will be yummy!

The last thing you should take from this is that stuffed noodles can work with manicotti recipes :)

Here i am checking on my noodles!

Tuesday, February 21, 2012

Tuesday Secret

Tuesday. It has become a day that I dread and look forward to at the same time.  Dread because I have a class that goes until 8pm. Look forward to because of our tuesday night dinner.  What is this dinner you might ask? Well let me tell you, in the form of a story. (Quite a short story really)

There once was a boy. He met a girl. They fell in love. Now they are married. One night, this boy and this girl were feeling hungry. "What shall we eat?" they both said. In fact, it turned into a chant.
"What shall we eat?"

The girl said, "I could make something." The boy said "Nah, that sounds like too much work." So the girl began her search. She looked high and low through a place called Google. Many places she did visit but alas there were too many possibilities!
"What food do you feel like, my love?", The girl inquired.
"Pizza!", The boy responded. (The girl should of known this by now, but alas it had only been a few months!)
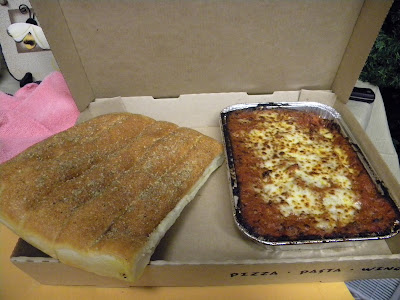
And so the search was narrowed. The girl once again searched. This time, going to more specific places such as "Little Caesars" and "Dominos". Fate intervened at this time, for then she looked at "Pizza Hut" There, on the screen so big you couldn't miss it was "It's Tuscani Tuesday, Pasta for 2 $6"  Could this be true? It couldn't be true. It was too good to be true!!! But as they soon came to find out, it was true. A pasta and 5 breadsticks for only $6!!!
They ordered. They waited (10 min). They picked up. They devoured.
Their tummies were full, they were felt exuberant and they couldn't ask for anything more.
The end.

So, as could probably be guessed by this great story, tuesday nights are now our Tuscani Tuesdays. Evan orders at around 7:45 and then when I get home, dinner is served! They even have two options, meaty marinara or creamy chicken alfredo. We switch off every other week.
We think this deal is too good to be true, but its still going so far!
And that is our Tuesday Secret. Enjoy!

Sunday, February 19, 2012

Chicken Noodle Soup - great for the sniffles.

Getting ready to be  eaten in a bowl that I colored! :)
On Wednesday Evan woke up feeling extremely sick.  His head hurt, his throat was sore, and he didn't sound good at all.  Luckily, I didn't get called into work so I was able to take care of him and get him whatever he needed.  I had been waiting for a good time to fix my homemade chicken noodle soup and this seemed to be it.  The thing about this meal is that a couple of years ago, I called my mom to ask her how to make chicken noodle soup and she told me roughly how to do it over the phone. It is definitely simple, but every time I make it it turns out slightly different since i'm not using an actual recipe.  This time as I made it I tried to pay more attention so I could write it down, so this is it.  Also, as a side note, although it is SO SIMPLE every time I make it I can't believe how tasty it is! And Evan loves it too. (Although this time he couldn't really taste it :)).  Another nice thing about this recipe is that you can adjust it very easily to make more or less.  For the amounts I used this time, I'd say it could feed around 4 people. 

Ingredients that go into the soup:
Chicken (2 breasts cut into pieces or 1 can chicken breast meat or 1 rotisserie chicken)
Optional:
Potatoes
Celery
Carrots
Any other vegetable you feel inspired to add
Egg Noodles
Marjoram
Salt
Parsley
Pepper
Bay Leaves
Water

Chicken Boullion Cubes


Recipe if using canned or rotiserrie chicken (notes at the bottom for using chicken breasts)

1. To start off, I put 8 cups of water into my pot and bring it to a boil. 
2. While the water is coming to a boil, I wash 4 medium size potatoes and between 1/4 -1/2 of a 32oz bag of baby carrots. (I know that isn't very exact or helpful but I forgot to count! I like a lot of carrots in my soup so I would suggest just adding how much you like)  To make this soup even easier, I have started using unpeeled potatoes in the soup.  I just make sure to wash the outside of the potatoes extra good.  I cut the potatoes into meidumish cubes and then I slice the baby carrots. 
3. Around this time the water is boiling and I add 9 chicken bouillion cubes to the water. Technically it is one bouillion cube to one cup of water, but I want to make sure my soup is always very flavorful! 
4. After the bouillion cubes have dissolved, add the carrots and potatoes.  Also, add some salt and pepper and if you want, a dash of I'd marjoram, parsley and chopped bay leaves.  Set the timer to around 10 minutes. When it goes off, test a couple of the vegetables to see if they are close to being done.
5. When the vegetables are about done (needing just a couple minutes more) add the canned chicken or rotisserie chicken - shred the chicken a little bit - and the egg noodles (a couple of handfuls seems to be perfect).  Let boil for about 3 minutes more and your good to go!


Here is the canned chicken I used. It was my first time using it ( I got the idea from Evan's mom) and it is easy and yummy!
Here are the egg noodles, or at least the package, that I would highly recommend using. They are located close to the other noodles in the grocery store.
And I made some cheese bread to compliment the meal. However, because i'd never used our broiler before I didn't realize how it cooked. Oops!
Surprisingly still yummy though :)
Evan cut his crust off just like an elementary school boy! ha ha.


*HOW TO ADJUST IF YOU ARE USING REGULAR CHICKEN BREASTS*
Cut chicken into bite size pieces.  Add the bouillion to the water and heat until it is dissoved. Add the chicken to the water and SIMMER the chicken until cooked. The key to non-chewy boiled chicken is to SIMMER the chicken, not BOIL.  Then, once the chicken is cooked, remove the chicken from the water and add the vegetables. Continue previous directions and then add chicken at the same spot as above.  This way your chicken doesn't get over cooked and is still good!
Also, if you are like me and just don't like boiled chicken, brown the chicken in a skillet with vegetable oil while boiling the vegetables etc. and then add the chicken in the same spot as above.

Good luck! And be prepared for a great meal! 

Stroganoff. So easy yet so tasty!

One of my favorite meals growing up was Beef Stroganoff.  My mom never understood why we loved it so much because she thought it was too simple. (She's an excellent cook so she likes more challenging things) Well the other day I was thinking about ideas of things to cook, and I realized I hadn't had stroganoff for at least 3 years. What a sad realization!  With this first attempt, I didn't get to ambitious because instead of making it with beef strips I used ground beef but it turned out amazing! And soooo easy. Oh and it didn't take that long, i think approximately 30 minutes. Which are three things i love in a recipe. (yummy, easy, and quick.) :)

Here is the actual recipe:
Ingredients:
1 (12 ounce) package egg noodles,
cooked and drained
6 ounces fresh mushrooms, sliced
1 onion, chopped
1/4 cup butter
2 pounds lean ground beef
4 tablespoons all-purpose flour
2 cups beef broth
1 cup sour cream
salt and black pepper to taste
Directions:
1.Bring a large pot of water to a boil. Cook egg noodles in boiling water until done, about 8 minutes. Drain.
2.Meanwhile, prepare the sauce. In a large skillet, cook mushrooms and onions in 2 tablespoons of butter over medium heat until soft; remove from pan.
3.Using the same pan, melt remaining butter. Cook ground beef in melted butter until browned. Mix in flour. Stir in beef broth, and cook until slightly thickened. Add mushroom and onion mixture; stir in sour cream. Season to taste with salt and pepper. Continue cooking until sauce is hot, but not boiling. Serve sauce over egg noodles.

I did step 1 the same, but steps 2 and 3 I did slightly different because I didn't have any mushrooms on hand.  To be honest, i think the mushrooms would of made it even better but I didn't want to make a trip to the store.  So here is what I did differently...and it was also slightly healthier... I took 1/2 an onion, diced, and about 1 tablespoon of vegetable oil  and sauteed them in my saucepan.  Then I added about 1 lb of ground beef and cooked until browned and then added 1 can of Consomme soup.
*Note- I have discovered that Consomme soup is more flavorful and healthy than beef broth.  It is located by all of the other soups in the store.
Anyway, after adding the soup i added 1 cup of lite sour cream and 3 tablespoons of flour and then some salt and pepper. At this point I let the mixture simmer for a bit until it looked slighly thickened and I called it good. This is what it looked like:
I poured it over the noodles, served with some green beans and me and Evan scarfed it all up. Another success!
As a side note, I have started to realize that a good majority of the meals I make call for ground beef.  Buying ground beef by the pound each time can get a little pricey. And i find that using the whole pound is usually a little too much for us.  So...
Helpful Hint #6: Buy your groundbeef in larger increments,(like 3 lbs.) divide it up into separate bags when you get home (I usually cut mine in 4ths) and call it good. It may not be an exact lb, but it will end up being perfect! I promise! And it is so much easier just defrosting the exact amount you need.

Wednesday, February 1, 2012

Homemade Mac N Cheese


So me and Evan are pretty fortunate this semester and get to see each other a whole lot more than I thought we would!  However, today he had a big huge yucky test that he needed to take so unfortunately I looked forward to a day and night by my lonesome.  How depressing.  Just kidding. It's nice to have some girl time.  Today I ventured into watching the show Parks and Recreation and I like it so far!  Tonight I decided I'd explore a new recipe, homemade mac n cheese.  I was very excited to cook this, because a couple months ago when i was at Target i came across a six piece CorningWare bake set that was on sale for $19.99 (thats a great deal if you don't know...:)).  I haven't had an occasion to use it until tonight!! I think everything turned out splendid.  Evan hasn't tried it yet, so i'll get his feedback tomorrow.  Here is the recipe:
Ingredients:
2 cups uncooked elbow macaroni
5 tablespoons butter, divided
3 tablespoons all-purpose flour
1 teaspoon salt
1/2 teaspoon pepper
1 1/2 cups milk
1 cup shredded Cheddar cheese
2 ounces processed cheese food (i.e.
Velveeta), cubed
2 tablespoons dry bread crumbs
Directions:
1. Cook macaroni according to package directions. Meanwhile, in a saucepan, melt 4 tablespoons butter over medium heat. Stir in flour, salt and pepper until smooth. Gradually add milk. Bring to a boil; cook and stir for 2 minutes or until thickened. Reduce heat. Add the cheeses, stirring until cheese is melted. Drain macaroni.
2. Transfer macaroni to a greased 1-1/2-qt. baking dish. Pour cheese sauce over macaroni; mix well. Melt the remaining butter; add the bread crumbs. Sprinkle over top. Bake, uncovered, at 375 degrees F for 30 minutes or until heated through and topping is golden brown.
This recipe turned out to be a success, and in all reality it is a very simple recipe, yet I wouldn't consider it "unstressful".  At least for a beginner cook like myself.  To begin with, it is one of those recipes where a lot of things end up going on at once.  But I got through it! And i'll happily make it again.  That's right, it's another 2 thumbs up recipe!
So, to begin with the beginning part of this recipe with butter and flour actually has an official name! It is called roux.  This particular mixture is what makes the base sauce thick.  And it's something we should all get really good at doing because it is involved in a lot of recipes (or at least recipes with sauce and gravy). Come to think of it, I've heard my mom talk about it a lot.  It isn't the easiest thing on the planet to do and it needs to be done right.  It can mess up consistency for a recipe (texture and thickness!)  So here is basically a great way of doing it (mine turned out perfect tonight so I think this is worth sharing)
--Melt the butter in a saucepan on medium heat.  When melted, stir in the flour.  It is better if you have a little more butter than flour (i.e 4 tbs butter to 3 tbs flour).  Stirring constantly is a must!  The next step for this recipe would be to keep stirring for about 2 minutes.  Then remove the saucepan from the heat and pour in lukewarm milk (not hot, not cold)  a little bit at a time while still constantly stirring.  Bring to a boil and cook for 2 minutes, all the while still constantly stirring.  And viola! You have your basic roux.  Luckily, the ingredients are pretty basic so if you mess up you can just start over.  I think the key would be the constant stirring.
Anyway as said before, because of the sensitivity of the roux it gets kind of hectic with needing to add more things and worry about the noodles, etc. all at once. So my next tip would be
Helpful Hint #5:  When making a recipe where a lot can be going on at once, have your ingredients all ready to go and all measured out!
This really saved me because I didn't have to stop stirring when i grabbed the cheese and added it to the mix. I did have to step away quickly to drain my noodles(so they weren't really soggy) but that was A-OK.  I like things cheesy so I used 2 cups of mild cheddar cheese instead of 1.  Oh and breadcrumbs on top is optional.  And that's about it ! Yum yum!

Monday, January 30, 2012

Green Chicken Enchiladas. Yum!


I think that something obviously must be going on here, because so far every recipe i've tried has turned out...delicious!  I guess it's because I am doing things so simple you'd have to be really distracted to mess up :)  I recently read a post by Tatum Norris on FB who said "I often cook straight from online recipes, and always read the reviews to get a good feel for it first. It just kills me when a reviewer says that they tried the recipe, but substituted the flour, sugar, and milk with oatmeal, pepper, and orange juice, and it turned out terribly, so it deserves no stars. I say if you do more than tweak it, don't rate it."
I agree with this wholeheartedly! Also, some people tweak it so much and then rate it with 5 stars.  How can I know which recipe to follow?  And on another note, sometimes all the ways they tweak it just overwhelms me to death.  I'm a beginner cook here.  When I look at a simple recipe, I want it to stay simple. 
This was a slight rant, and also kind of hypocritical because I seem to be tweaking every recipe I'm trying here on this blog.  So, I guess if my tweaking gets too crazy just laugh and say i'm like the pot calling the kettle black. 

So, I tried out some green chicken enchiladas. So so so good.  And so so so easy.  Here is the recipe:
Ingredients:
1 pound skinless, boneless chicken
breast halves
12 (10 inch) flour tortillas
1 (8 ounce) package shredded Monterey
Jack cheese
1 (19 ounce) can green enchilada sauce
Directions:
1.In a pot with enough water to cover, boil the chicken 25 minutes, or until juices run clear. Drain, cool, and shred.
2.Preheat oven to 350 degrees F (175 degrees C). Lightly grease a medium baking dish.
3.Fill each tortilla with equal amounts of chicken and cheese, reserving 1/4 cup cheese for topping. Roll tortillas to form enchiladas. Arrange enchiladas in the prepared baking dish. Cover with the enchilada sauce.
4.Bake enchiladas 30 minutes in the preheated oven. Top with reserved cheese, and continue baking 5 minutes, until cheese is melted.

First item of business, like previously mentioned I always prefer to cook my chicken in a saucepan rather than boiling it.  This should be...
Helfpul Hint #4: In all instances possible, cook your chicken in a saucepan rather than boiling it in water.  Always seems to turn out better!
I like the flavor and texture much better AND it doesn't seem to get overcooked as much.  So for this recipe, I cut up the chicken into cubes and threw it in a saucepan with lemon juice, garlic powder, chili powder, salt, pepper, and paprike.  If you don't have those spices, not to worry! It turns out great without.  However, I would recommend getting those at some point because they add some good flavor to quite a few recipes.  Also to note, 12 tortillas is way way too many.  The max I could fill with a decent load of chicken and cheese was 8.  And thats a lot anyway so i'd go with that.  If possible, buy the brand Las Palmas green enchilada sauce.  It seems to have the best flavor and it is the perfect thickness! Since this is the main ingredient, I don't know if i'd go with any other random brand. I didn't have 8 oz of monterey cheese, but i mixed what i had with cheddar and it was awesome.  And like all recipes so far, this had plenty of leftovers! Have fun.

P.s. Do NOT add more than the 19 oz of enchilada sauce.  When looking at the enchiladas covered with the sauce, they look a little...bare.  However, trust me on this! If you add more sauce, the tortillas just get really soggy and the texture is unbearable.  Air on the side of too little in this case.

Tuesday, January 24, 2012

Salsa Chicken Rice Casserole

 Hi! I guess I'm on a roll because I don't think i'll usually be cooking things so frequently.  But! I'm pleased to say that this meal turned out AMAZING.  Two thumbs up! It is actually the second time i've made it, and it is just as good the second time.  I think one of the best things about this meal for me and Evan is that it is a lot of food which means a lot of left overs.  And it reheats wonderfully.  It is pretty easy prep, but it does take about an hour to get your meal.  Worth it!
Here is the recipe:
Ingredients:
1 1/3 cups uncooked white rice
2 2/3 cups water
4 skinless, boneless chicken breast
halves
2 cups shredded Monterey Jack cheese
2 cups shredded Cheddar cheese
1 (10.75 ounce) can condensed cream
of chicken soup
1 (10.75 ounce) can condensed cream
of mushroom soup
1 onion, chopped
1 1/2 cups mild salsa
Directions:
1. Place rice and water in a saucepan, and bring to a boil. Reduce heat to low, cover, and simmer for 20 minutes.
2. Meanwhile, place chicken breast halves into a large saucepan, and fill the pan with water. Bring to a boil, and cook for 20 minutes, or until done. Remove chicken from water. When cool enough to handle, cut meat into bite-size pieces.
3. Preheat oven to 350 degrees F (175 degrees C). Lightly grease a 9x13 inch baking dish.
4. In a medium bowl, combine Monterey Jack and Cheddar cheeses. In a separate bowl, mix together cream of chicken soup, cream of mushroom soup, onion, and salsa. Layer 1/2 of the rice, 1/2 of the chicken, 1/2 of the soup and salsa mixture, and 1/2 of the cheese mixture in prepared dish. Repeat layers, ending with cheese.
5. Bake in preheated oven for about 40 minutes, or until bubbly.
So, first of all I came from a family that steered clear of onions.  So my personal preference is to have less onions if possible.  I used 1/2 of an onion for this meal and it tasted great!  Also, the first time I made it I made as written and it seemed to be a lot of unnecessary dirty pans.  So this time I made it like this: I put the chicken in the skillet with the onion and browned them both at the same time. This also helps to make sure the onions are not crunchy! Then I added the salsa and soups to the chicken and simmered till chicken was done.  As far as the rice and cheeses go, I did those the same and layered the same.  I always like my chicken done in the skillet if possible.  Boiled chicken seems to get very chewy in my opinion.  The first time I made this, I didn't have a whole thing of salsa, so I used about 1 cup of salsa, and I didn't see a big taste difference.  Improvising works well with a recipe like this! This recipe can feed up to 6 people or in our case, 2 with a whole schlode of leftovers!!

I don't know if anybody has tried the previous basil chicken pasta recipe but *warning* it uses garlic, and my hands have smelled like garlic ever since.  I have washed my hands too many times, and I even shampooed my hair twice to no avail.  I love using garlic in recipes, but if my hands have to smell like this, Evan is never going to want to be near me! So I have 

Helpful Hint #3 - to remove the garlic smell from your hands, rub your hands with any stainless steel utensil!! It works!!! Baking Soda also works (no surprise there...)

Fun Fun! Thanks for reading!


Sunday, January 22, 2012

Basil Chicken and Pasta


All I can say is SUCCESS!!! I was a little unsure of how this was going to turn out because it takes very few and very basic ingredients but me and Evan both give it two thumbs up. 
Here is the original recipe: (my further comments at the bottom)
Ingredients:
1 (12 ounce) package rotini pasta
2 tablespoons butter
1 pound skinless, boneless chicken
breast halves - cut into 1/2 inch cubes
3 cloves garlic, minced
1/2 teaspoon ground black pepper
2 teaspoons dried basil
1 cup heavy cream
1/4 cup grated Parmesan cheese
 Directions:
1. In a large pot with boiling salted water cook rotini pasta until al dente. Drain.
2. Meanwhile, in a large skillet melt the butter or margarine. Add the chopped chicken and garlic, saute until lightly brown and juices run clear. Stir in the ground black pepper, dried basil, heavy cream, and grated Parmesan cheese. Bring to a boil and simmer for 3 to 4 minutes.
3. Toss drained pasta with basil sauce and serve immediately.

Ok so to start off with, my newest discovery that is a very useful tidbit of information is...
HELPFUL HINT #1: 1 lb of chicken is the equivalent of 2-3 chicken breasts.
Of course, this is not exact because the size of chicken can vary but use your best guess.  I used two frozen chicken breasts and it turned out perfect.  Which leads me to
HELPFUL HINT #2: When defrosting the chicken, take it out when it is still slightly frozen.  It makes cutting it SO MUCH EASIER!!!
Maybe these are things that all ya'll know, however like previously mentioned i'm a newbie cook.  I'm happy to say that the second hint I discovered all by myself :). 
When we were grocery shopping last night Evan was in charge of getting the Heavy Whipping Cream.  To him, whipping cream and heavy whipping cream were equivalent.  However, I am pleased to say that i did in fact use regular whipping cream for this recipe and it turned out FABULOUS!! Plus, it just so happens to be more healthy so boom bam baby.  On the healthy note, i also substituted 2 Tablespoons of olive oil instead of butter and it worked out just fine.  I wanted the sauce a little thicker so I doubled the parmesan cheese
As previously mentioned, this recipe turned out fabulous! It had flavor, but was mild enough that we could each eat a whole plateful.  Definitely something I'll be making in the future.  And to top it all of, it was sooo easy.  The only preparation was the chicken.  Thats my kind of meal! (We did have more noodles than sauce left over, so if I were making for more people I would double the sauce. For us it was perfect.)